How to train your own object classifier using Goggle’s Coral TPU?
In June 2019, Google released an Edge-TPU (Tensor Processing Unit) named Google Coral. It’s a device which allows you to run AI models on embedded systems, e.g a Raspberry Pi. That is what we use in Reachy to do object detection or classification.
What is object classification?
In Computer Vision, the task of object classification consists in predicting the class of an object in an image.
For example in our application of TicTacToe, for each board case we are classifying if it contains a cube, a cylinder or nothing. That means we will not try to localise the exact position of a cube on the board but only if one is present in a board case or not. To get the full board configuration, we simply run this classification on each of the 3x3 board cases.
In this post, we will explain how you can train a classifier to perform object classification with your own data! This can be applied to TicTacToe board analysis but to any other task where visual classification is needed.
The instructions detailed in this post are based on a post on Google’s Coral documentation: Retrain a classification model on-device with weight imprinting | Coral
1. Collect and Prepare your data
The first step is to collect images of the objects that will form your training data.
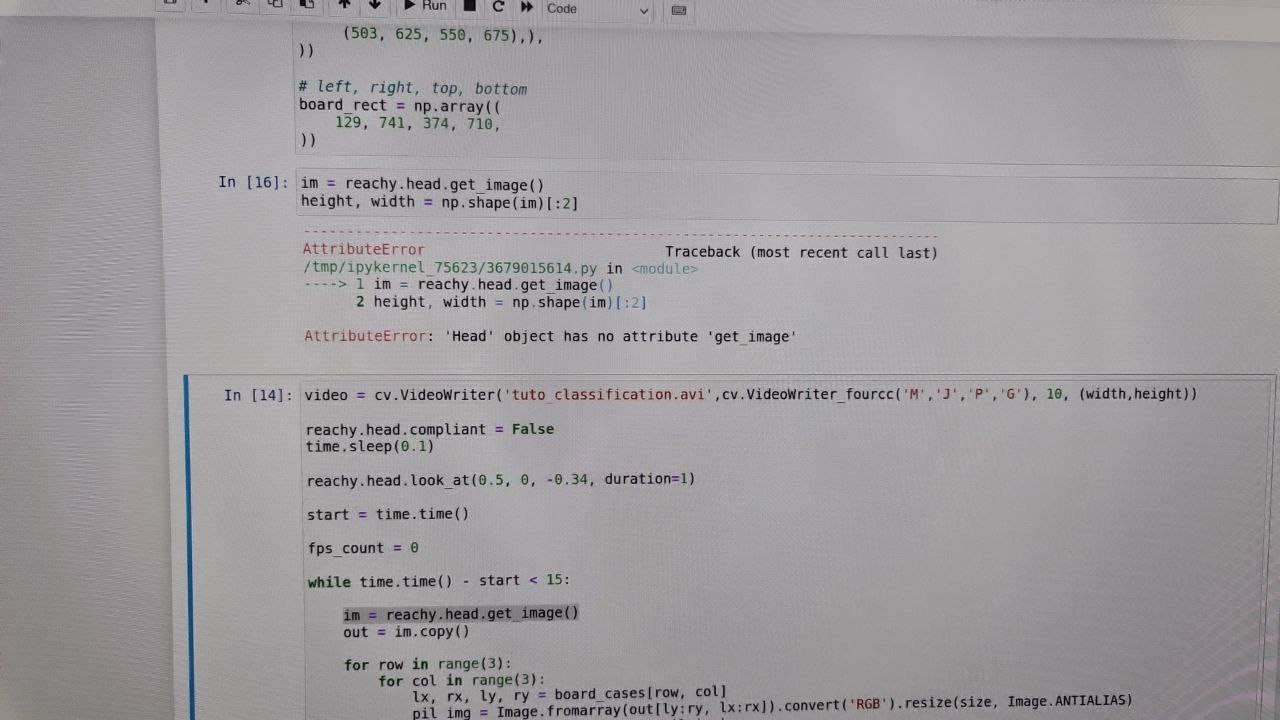
You can easily get images from Reachy’s head using Reachy’s API.
To do that you need the following:
from reachy import Reachy, parts

reachy = Reachy(
    head=parts.Head(io='/dev/ttyUSB*'),
)
This will instantiate an object reachy to interact with the head.
Then you can get the images using:
image = reachy.head.get_image()
Try to collect images where the objects you want to classify are in various positions and where ambient conditions varies (such as the brightness) to improve the performance of the classifier.
Be careful, the images you choose for each class should only contain one object. If you have multiple objects on the same image the model will not know what to focus on during training. Don’t hesitate to take an image and crop it to keep only the part where the object is.
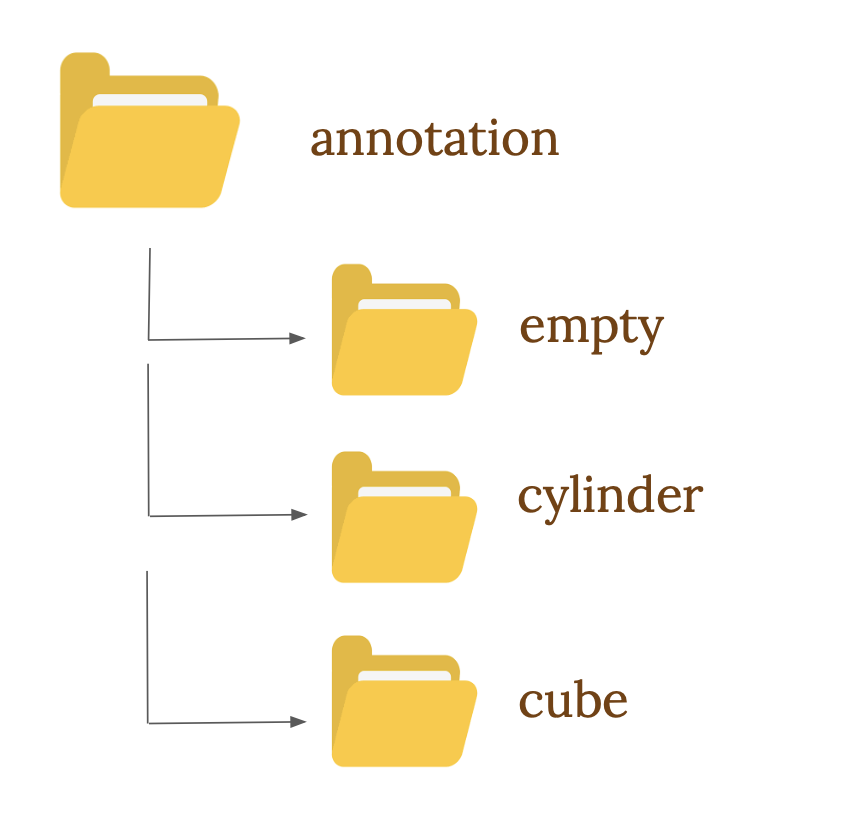
Next you need to organise the images you collected.
You need to create one folder per class of object. Each folder should have the name of a class. Then put images of your objects into the corresponding class folder. There is no need to put a lot of images, 10 for each class should be enough to do the job.
For example in our case we have three folders : Cube, Cylinder and Empty.
Put all these folders into one empty folder, let’s call it Annotation.
In our example, our workspace has the following structure:
2. Train the model: Transfer Learning
We are doing Transfer Learning to train our custom object classification model. Transfer Learning is a Machine Learning technique where a model is trained using the weights of pre-trained model. It speeds up a lot the learning process. It has the advantage of using the features that the pre-trained model already learned and apply them to learn how to classify new objects.
The first step to train the classifier is to get a pre-trained model. Google offers multiple pre-trained object classification models which are compatible with the Coral. https://coral.ai/models/
We chose the model suggested in the documentation (MobileNet v1) but feel free to try out other models.
To train the model with your data, use the following script from Google: https://github.com/google-coral/edgetpu/blob/master/examples/imprinting_learning.py.
You can clone the whole repository edgetpu but it is quite heavy and you will not need other features for this application.
The use of imprinting_learning.py is the following:
python3 imprinting_learning.py
   --model_path  path_to_the_pretrained_model
   --data path_to_your_annotation_folder
   --output name_of_your_model.tflite
--model_path : indicate the path to the pre-trained model you downloaded in the previous step. If you downloaded the model ssd_mobilenet_v1 as mentioned, the name of the model will be mobilenet_v1_1.0_224_l2norm_quant_edgetpu.tflite.
--data : path to the folder which containing the folders of each classes created in Step 1. Make sure that there are no files in this folder other than the named folders containing the images of each classes.
--output : name that the trained model will have. Make sure to add the file extension .tflite
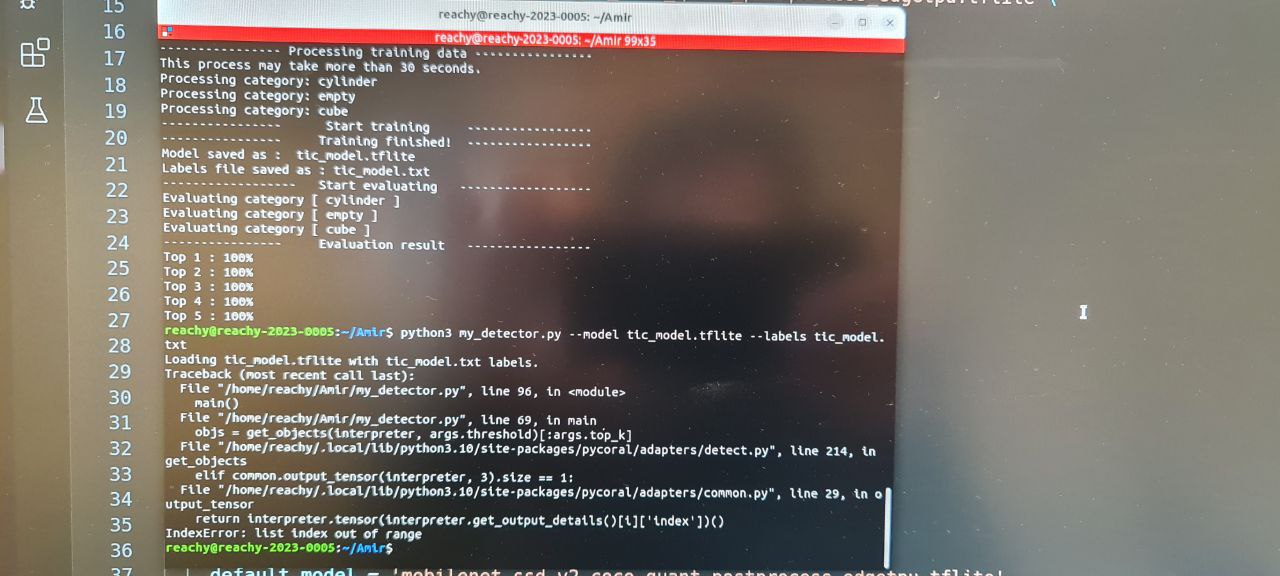
The training should be fast, less than 30 seconds, but it might be a little longer depending on the number of images you have in Annotation.
3. Use the trained classifier
Now that we have a trained classifier, we can use it to do inference on new images.
We will use Google’s Coral API for that.
To infer with the model, import the following:
from edgetpu.classification.engine import ClassificationEngine
from edgetpu.utils import dataset_utils

from PIL import Image
ClassificationEngine will permit to instantiate a classifier from the trained model.
dataset_utils is used to create the dictionary of our classes labels.
Image will allow us to convert the new images we want to classify into a format that the classifier will understand.
Then, you can instantiate the classifier and get the labels.
engine = ClassificationEngine('name_of_your_model.tflite')
labels = dataset_utils.read_label_file('name_of_your_model.txt')
Give to the ClassificationEngine the path to and the name of the model you chose in the training.
The .txt file is automatically generated during the training. Its name will be the same as your trained model.
In our TicTacToe classifier, the labels look like this.
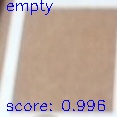
labels = {0: 'empty', 1: 'cube', 2: 'cylinder'}
This means that when we give a new image to the classifier, if the output is 1 then the classifier thinks that there is a cube in the photo.
To perform inference, use the method classify_with_image on the image converted with Image.
pil_img = Image.fromarray(img)
result = engine.classify_with_image(pil_img, threshold=0.8, top_k=3)
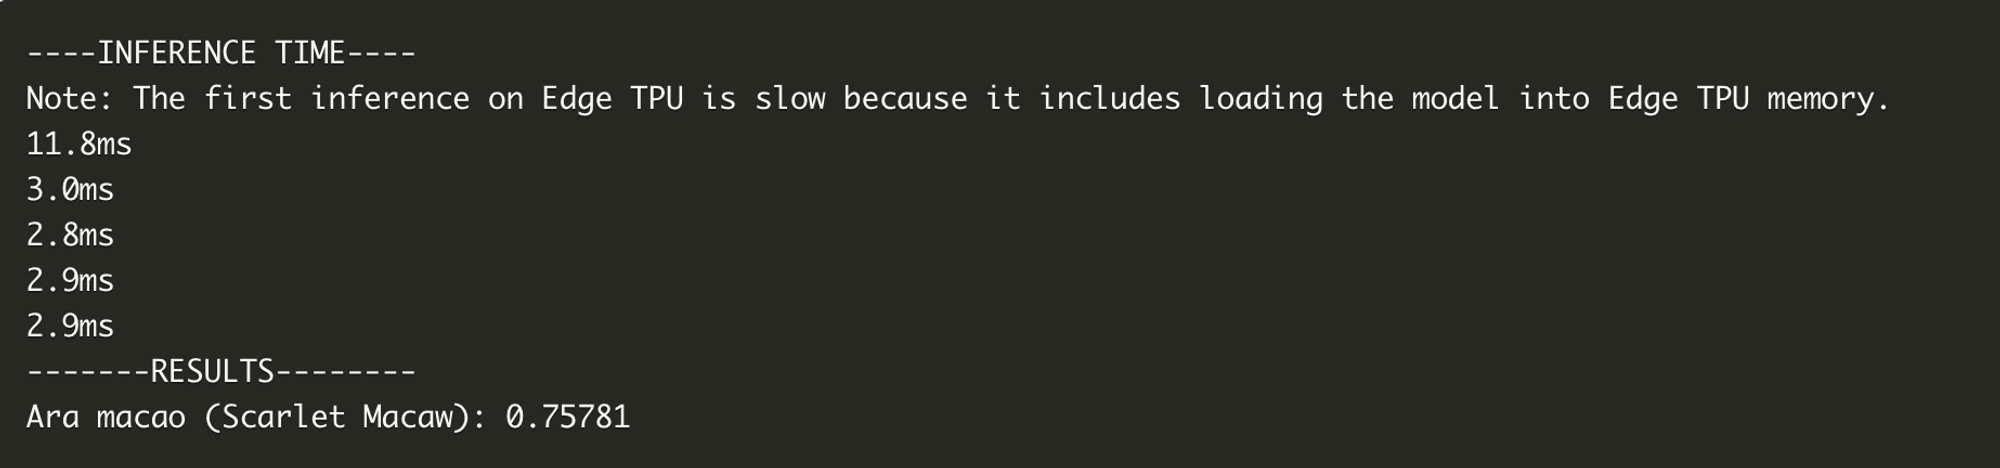
result will correspond to a list containing the id of the class identified by the classifier along with a confidence score between 0 and 1.
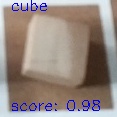
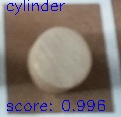
For example, when we gave to our TicTacToe classifier the first image that you saw at the beginning of the post, the output was:
result = [(1, 0.98)]
This means that for this image, the classifier was sure at 98% that the image contained a cube, which was the case!
The inference time for a classification with this model is around 6 ms. This is the strength of Coral, with this you can imagine real-time applications which include inference of AI models and can run on embedded systems.
threshold and top_k are two optional arguments of the method classify_with_image.
threshold: corresponds to the minimum confidence score. Class candidates which have a confidence score below this will not be returned by the classifier. (threshold = 0.8 by default)
top_k: maximum number of class candidates that the classifier should return. (top_k=3 by default)
That’s it! You now know everything you need to build a custom object classification Google’s Coral Edge TPU!
You can find a demo video here:

The code to produce this video with Reachy can be found on our tutorials repository : https://github.com/pollen-robotics/tutorials.